Jimny/Tray Tail Lights Installation and Wiring Guide

Jimny/Tray Tail Lights Installation and Wiring Guide
Give your Suzuki Jimny or ute tray a fresh, polished look with these Plug & Play Full LED Tail Lights. Suitable for a wide range of vehicles and custom applications, they combine style with reliable performance. Here’s a quick step-by-step guide to get them installed properly and wired up.
Jimny Installation:
What You’ll Need
- Electric Ratchet
- Bumper Trim Removal Tool or Flat Head Screwdriver
- Your new Jimny/Tray Tail Lights (pair)
Step 1: Remove Bumper
Using your ratchet, remove all screws to loosen the bumper. Then, use a bumper trim removal tool or flathead screwdriver to remove the clips from the rear bumper skin.
Step 2: Disconnect the Factory Plugs
With the bumper pulled away, you will now be able to access the factory plugs that need to be disconnected. Please note, if your vehicle is fitted with a reverse camera, this plug will also need to be unplugged before the bumper can be fully removed.
Step 3: Remove Factory Tail Lights
Using a ratchet, locate the three bolts securing the tail light in place and remove them completely. There are also two small clips that will need to be released in order to fully remove the factory tail light.
Step 4: Fit the New Light
Flip the bumper over and feed the new tail light plug through the provided opening before positioning the tail light into place. Once fitted, reinstall and tighten all bolts, ensuring the clips are securely pushed fully into position.
Step 5: Connecting back up and testing
Our tail lights are designed for a plug-and-play installation on the Suzuki Jimny, allowing you to simply connect them directly to the factory plugs. If your vehicle is fitted with a reverse camera, reconnect this at the same time as well.
Before reinstalling the bumper, test all functions including the park lights, brake lights, reverse lights, and indicators. If any functions are not working, double check that all plugs are securely connected and not loose. Once everything is functioning correctly, you can proceed with reinstalling the bumper.
Universal Tray Installation:
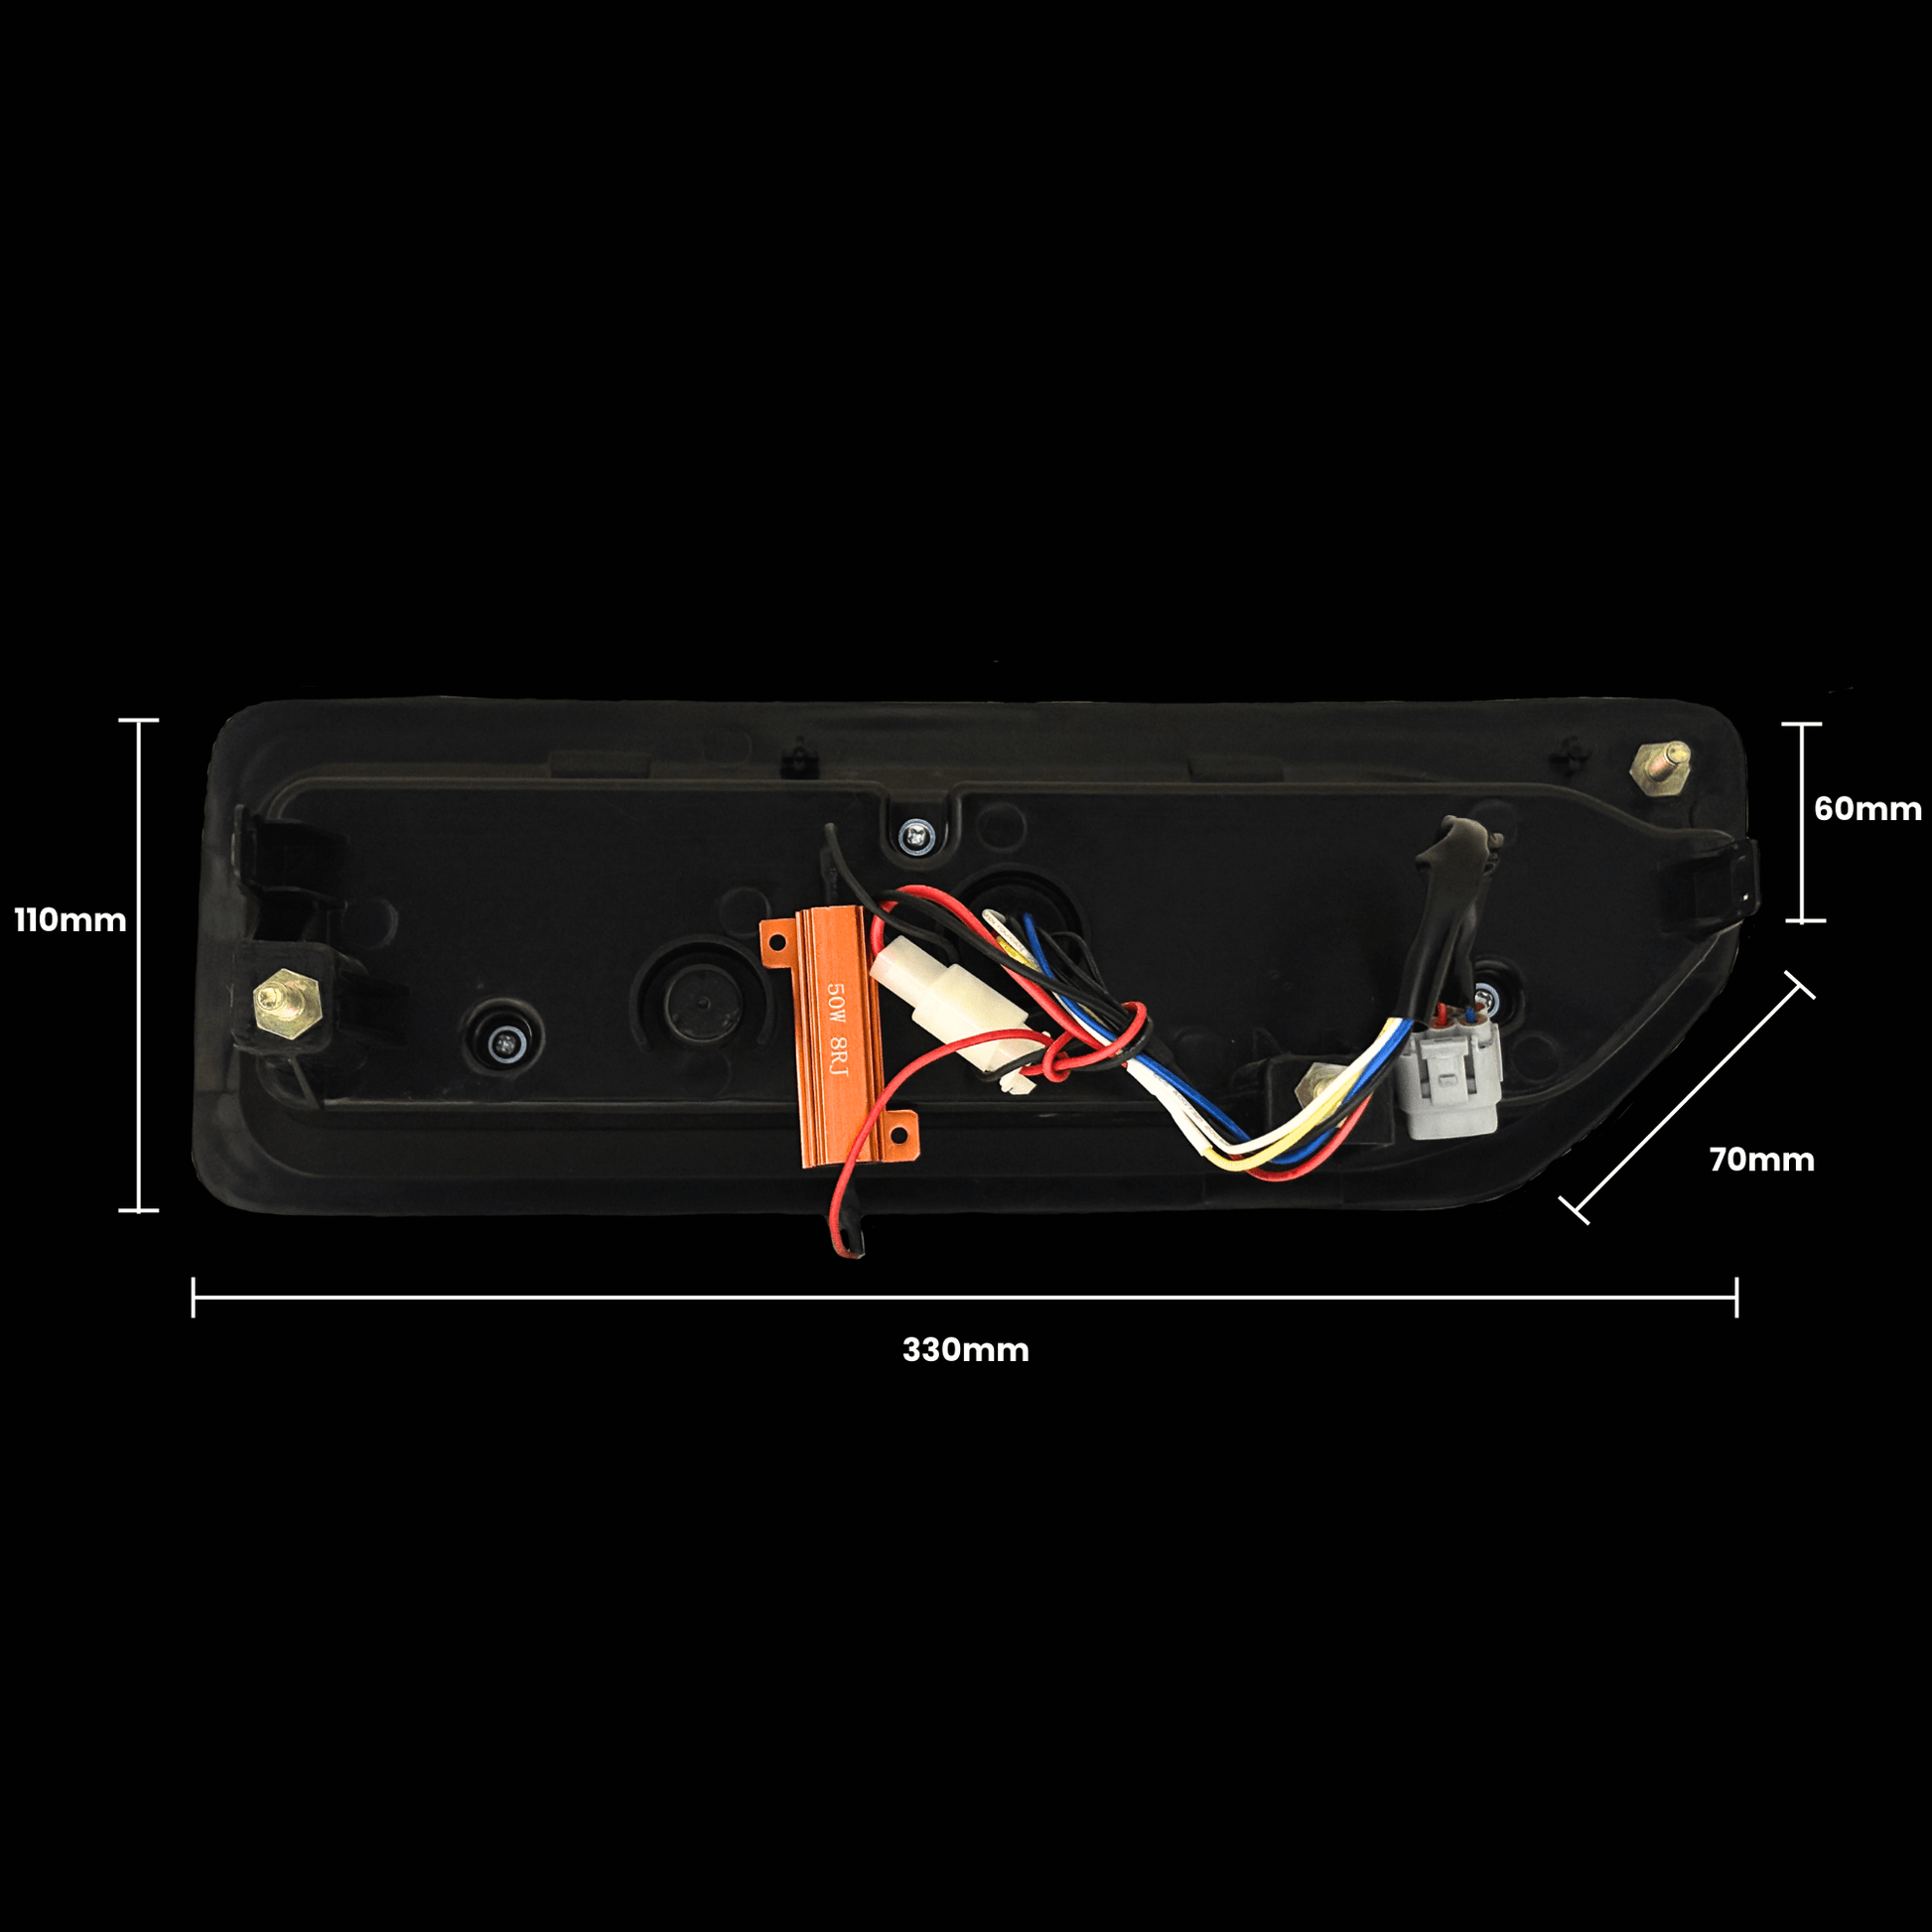
Before installation, please refer to the measurements diagram below to confirm the tail lights will fit your tray setup correctly.
As these tail lights are recessed, they cannot be mounted flat onto the tray surface due to the rear mounting screws and housing depth. Installation will require cutting and recessing the tail lights into the existing tail light area on the tray.
Once you have confirmed sizing, it will simply be a matter of carefully cutting the required opening to suit the recessed housing and ensuring enough clearance is provided for the mounting points and wiring. After test fitting, the tail lights can then be secured into position. As far as wiring please see the below wiring pin out below.
Wiring pin-out:
Black - Earth
Yellow - Indicator
Blue - Park
Red - Brake
White - Reverse